Showing posts with label Illamasqua. Show all posts

Sunday, 11 August 2013

Hype


A face of the day post for ya'll today. I recently caved to the Illamasqua summer sale and bought 'Hype' an acid yellow eyeshadow with a matte finish. I'm aiming to increase the colour range in my kit, but couldn't resist trying it out on myself first!

I used Benefit's 'Stay Don't Stray' eye primer, two brown shades from the Urban Decay Naked Basics palette, and Illamasqua 'Hype.' I smudged MAC Kohl in 'Smoulder' underneath my bottom lashes, and added some falsies, finishing off with a slick of black gel liner. Totally over the top, but it was fun, and I am surprised by how much I liked yellow!

Blogging is going to be a wee bit absent for the next week, as I don't have a day off now until next Sunday on which I am sure I will be gently rocking myself back and forth in a corner, in blankets, with my phone turned off, catching up on BINTM or some shizz. Then I am off to London for a few days but hope to get a couple of posts sorted for then. All the best til then.


Thanks for reading,

E.

Thursday, 25 July 2013

Hydra Veil.

Illamasqua Hydra Veil, £27 for 30ml.


When I first heard about Hydra Veil I thought it was a very daring move for a colour brand like Illamasqua to release something with a rather large nod to skincare. They market it as a hydrating fluid with it's high content of hyaluronic acid, however for me it works fantastically as a primer.

HydraVeil smoothes out my skin, it isn't full of silica and it doesn't feel like a thick, heavy paste like other primers that I have used in the past. It prolongs the wear of my foundation by 2-3 hours than if I wear it without. Even on high heat days, it performs well. I use it regularly on clients and models alike because it has no SPF so benefits the photography, it also seems to suit all skin types and help the foundation apply as smoothly as possible.
I don't notice any skin care benefits, I don't even notice the 'flood of hydration' that Illamasqua describe, rather the finish is actually quite sticky which I am sure helps adhere the foundation. Expecting my skin to look dewy and refreshed, it actually makes the finish of my foundation quite matte.


It's a very unique consistency. A wobbly jelly in the pot it smoothes to a more liquid finish when being massaged into the skin. No matter how many times you stir the product, it always settles back down into a smooth, ice like finish in the end.

The packaging lets the product down. It isn't very nice to look at, it's a bulky black cauldron and the 'Illamasqua' branding rubbed off after about three uses. There's a flip lid underneath the main screw lid, and this has snapped off and won't go back on. It's a pretty integral part of the design as it protects the jelly from any dust etc. It's really disappointing because I have over half of the product left. These are the sort of elements that should have been tested thoroughly before a product release, it seems rushed and the packaging would definitely benefit from a redesign.

While primers often get forgotten in my daily routine more often that not, I do use this product in my kit on the regular. It's hard to say right now whether I'll repurchase or try something else, at £27 it deserves to have sturdier or more aesthetically pleasing packaging!


Thanks for reading,

E.

Saturday, 20 July 2013

Iggy Azalea inspired; Tuxedo Eyeliner


Thought I'd try out 'Tuxedo Eyeliner' after spotting it on the video of one of my favourite songs this year so far- Iggy Azalea Work. It has been non stop in our household, let me tell you that. Though did anyone else hear her interview on Radio 1 last Sunday? Talk about bland.

To create this look, it is quite straight forward but does take a bit of time and does need a steady hand. I chose a soft smokey eye as a base, main colours used were my Urban Decay Naked Basics palette (couldn't be without it) and Daniel Sandler eyeshadow in 'Tornado' (review to come on that one soon.) I first lined and winged my eyes, following the eyeline using MAC 'Blacktrack' gel liner and a thin brush. Secondly I followed the line on top using Illamasqua's liquid eyeliner in 'Scribe'- a pure white. A bit watery at first, this does need two coats to be opaque. After that had dried, I re-lined the black line, to correct any bleeds and to deepen the colour. 
Followed with lashings of mascara and my base makeup as usual, the look was done. Probably not the most wearable, everyday looks but I haven't done anything for just a bit of fun in a while. I've been so bogged down with bridal trials and wedding days (not that I'm complaining, I love what I do) that I was itching to try something a bit creative!!


Let me know what you think. Thanks for reading,


E.

Monday, 24 June 2013

Model Makeup #2

This is the second in my series about makeup looks I have done on recent photoshoots. 

Today's model is Abi Green. It was great working on Abi because she is an agency represented model, and had a face that just comes alive with makeup (and the most perfect baby soft, blemish free skin I have ever seen!!)


Instagram: emilylaurenbeth
I was shown the outfit (it was all from Urban Outfitters) and was immediately drawn to the gorgeous neon coral colour of the top. I knew I wanted to reflect how fun and beautiful this colour was in her makeup too. For her lips I mixed two Illamasqua shades together, a bright matte orange called 'Flare' and a bright neon pink 'Immodest'. I used Bobbi Brown Foundation Sticks for her base and contoured with MAC 'Harmony' blush to accentuate her amazing cheekbones and then added a sweep of pink blusher to add some warmth and colour  as contour alone would have looked quite severe.

On her eyes I primed her lids with Urban Decay's matte primer potion, which is so good I have to say. On top I created a blown-out, soft wash of colour using the pink and copper shades from the Paranormal Palette from Illamasqua's latest collection. Using MAC's soft kohl eyeliner in 'Smoulder' I lined her waterline and finished off with lashings of MAC Opulash mascara. Her eyebrows were very fair so I added some definition with MAC 'Omega' eyeshadow. 
The finishing touches...
I painted her nails with the brightest pink I had on me, which was one by Maybelline. I wanted to keep her amazing skin quite fresh and glowing so I didn't add any powder until just before she was photographed, and only to her T-Zone.

The shoot was in preperation for an exhibition which has been on show in Urban Cardiff for a couple of weeks now. It's nice seeing some of my work on the walls, makes me remember why I love doing makeup so much. And I would love to work with Abi again!

Here's a final shot:


Lewis Hughes-Evans photography, Abi Green model.

Saturday, 1 June 2013

Model makeup #01

Evelyn so kindly included my blog in her '5 Blogs To Follow' feature earlier this week and in it she mentioned that she hopes I do more makeup artist related posts. I'm not sure whether many people are interested in this but I thought it couldn't hurt to do a 'trial post'. I thought a small behind the scenes type post about photoshoots I work on could be of interest to some of you if I tell you about the look I was going for and the products I used to achieve this. It's something a bit different and a lot more personal in one way, than I have included on my blog before. I try and keep work/blog/life as separate things but inevitably they will overlap at times :-) 
Anyway what I am getting at is feedback is appreciated! Let me know if you do or don't enjoy this post.


Instagram: @emilylaurenbeth
On Thursday I organised a beauty shoot with my photographer pal Lewis. One of the models, Naomi, is who I'm showing you today.
The vision of the shoot was just to experiment with vivid, vibrant colour. It was going to be beauty focused, (so mainly head shots with no attention to clothing or body poses) with a mainly editorial approach.

For one of the looks I decided to go all out. A test shoot is a perfect time to experiment with new ideas or techniques as it is a safe environment to learn. I decided to keep Naomi's skin fresh because she had these amazing freckles all over her face, so I made a tinted moisturiser just to even out any redness she had. I used Illamasqua Sealing Gel on powder eyeshadow 'Fame' to turn it into a liquid paste. Using an angled brush I filled her brows in with solid green colour!
Eyebrows have been 'on trend' in various forms (bushy, filled, feral) for a few years now, then there was the time Chanel hit the runways with amazing embellished brows. Many catwalk trends are unlikely to filter down to 'real people' but the element of the brow being a feature in day to day makeup definitely has. I love eyebrows and knew it was something I wanted to include in this shoot, so why not colour them in?

I created a simple contoured eye using NARS eyeshadow 'Abysinnia' and the Urban Decay Naked Basics palette, with eyeliner flicks using MAC gel liner in 'Blacktrack.' In hindsight I would have made them a bit bolder and thicker. 
At first I kept the lips bare and then for a few more shots I put MAC 'Vegas Volt' lipstick on her. You can see both looks in the instagram images above, let me know which one you think looks best.

I put her hair up in a bun and placed some fake flowers that I found in the studio in, I think it really helps make the photo and ties the overall look in together well. 

So there we are, a little behind the scenes summary of a recent test shoot. I think that Naomi did a great job considering she doesn't model very often, and Lewis did a good job of capturing my vision! Here is a final picture:


Lewis Hughes-Evans photography, Naomi Shalom model.
Thanks for reading,

E.

Friday, 24 May 2013

Illamasqua 'Masquara' Review

Illamasqua Masquara in 'Raven', £16.50 for 10ml.


It was going to take something really special to follow in the footsteps of Lancome 'Hypnose Drama'. You can read a review of what I thought of that one here but today I am going to tell you about Illamasqua's mascara- Masquara in shade 'Raven'.

The brush is quite large, rounded, and fibrous. The bristles do a good job of coating each lash but I do think the main factor to discuss here is the formula. Masquara is very wet, even a couple of months down the line it has maintained it's moisture which is surprising. Apparently it has built-in lash conditioner, and while I can't say I have noticed a host of new  lashes growing, I have noticed that they feel a bit more luscious and soft. Due to it's high moisture content, it takes longer than the average mascara to dry but I do believe that the results are worth it, it adds natural, but bold volume (and you have to work quite hard for it to show any signs of clumpiness.) The brush and moist consistency lengthen the lashes and once it has dried it does a good job of keeping my lashes curled throughout the day, which is a problem I have battled with in the past.
The colour is Raven black as the name suggests and is non flaky. Considering this mascara isn't waterproof, I have experienced absolutely no smudging or flakiness since using it and it even seems to suit my sensitive, watery eyes. 

Items like mascara are easy to over look when shopping with a brand like Illamasqua as the colour range will immediately distract from 'core' basics. However I was pleasantly surprised by Masquara as I really wasn't expecting it to be very good. The price has just increased by a pound from when I purchased it which I think is cheeky however it remains fairly affordable and is one I will definitely be buying again.


Thanks for reading,

E.

Sunday, 19 May 2013

Spring 'base' makeup


My 'base' makeup of choice at the moment is very different to what I have been reaching for the last few months.  The rich foundations with high coverage have been swapped for something a bit lighter.

One reason I prefer a lighter coverage is because it lets my (pathetic excuse for) freckles show through. I love freckles. Whenever I am on a makeup job I hope for a model with freckles because I just love making them a feature, and while I won't step foot in the tanning booth again (Summer 2010 was my tan bed hay-day) I do wish there was a way to make my own more distinguished. Lancome used to make a freckle crayon but I am not sure I have the guts to paint freckles on my own face just yet. I'll get back to you on that one.


I've been prepping my skin with a pea sized spoonful of Hydra Veil from Illamasqua, I don't buy all of the benefits they claim it to have, but to be fair it is the best primer I have used so far. While it offers a 'wave' of hydration to the skin (and a definite cooling effect), it keeps the appearance of my skin surprisingly matte and I do notice my makeup stays put for a bit longer than normal when I use this. It is a very unique jelly- to- liquid consistency, I don't like the presence of the alcohol content on the ingredients list but at least it is paraben free unlike a lot of their cosmetics, and it does contain hyaluronic acid which is of course a plus (great for glowy skin.)

Next I warm some of Yves Saint Laurent's 'Le Teint Touche Eclat' foundation between my fingers and work it into my skin. I really do think this foundation works best using fingers, and it isn't often you would catch me saying that (please just make sure your hands are clean first!)
I tend to ignore powder these days, but if I do use any I just dust some lightweight translucent powder on my t-zone. I follow by working a cream blusher into the apples of my cheeks, which maintains the radiant finish of the foundation. My current favourites are MAC Cremeblend blush in 'Something Special'- a bright peach pink, and Illamasqua Cream Blusher in 'Dixie' -a deep coral. For the ultimate lazy finish, I dab a bit of whichever cream blusher I have chosen for my cheeks onto my lips.

That's my current base makeup routine- fresh faced, lightweight, quick and very easy. The foundation does contain an SPF of 19 but I would advise adding your own SPF with your morning moisturiser.


Thanks for reading,

E.

Tuesday, 7 May 2013

Emerald, the colour of 2013?


Each year trends in both clothes and makeup are inevitably affected by the Pantone 'colour of the year'. After the Pantone View is published, fashion usually follows suit and the chosen colour is often reflected in areas ranging from interior design to floristry. I find this whole idea of a 'chosen' colour absolutely fascinating, I would love to own a Pantone brochure just so I could oggle at the beauty of colour all day. I think we definitely embraced last years Tango Orange, the colour was in all of the shops and seeing girls wearing a bold orange lip became more and more common, however I feel that this years choice of 'Emerald Green' will take a bit more adjusting.

In makeup, colour is often considered hard to embrace, and it absolutely is. I am a strong believer that it is deemed more socially acceptable to embrace colour through clothing than it is through makeup. Most of you probably wouldn't think twice seeing somebody use an emerald green clutch bag as a colour accent to an outfit, but in terms of wearing it on your face I imagine only a fair few would be comfortable doing. 

However, as this is a makeup blog it only makes sense that I document my embrace of the Pantone Colour of the Year 2013 in a makeup look, let me know what you think or how you would choose to wear the colour. My Emerald Green of choice is a powder eye shadow from Illamasqua called 'Fame'. Illamasqua are definitely my first go-to brand when searching for new pigments, they have it all. I paired it with a copper bronze eyeshadow in 'Bronx', lashings of mascara and a pair of falsies. If you're going to use a bold colour such as green on the eye, I do think lashes are a must, to make it a feature and complete the statement look.

Thanks for reading,

E.

Monday, 6 May 2013

My Make Up Artist Lip Palette

Top row L-R: MAC Blankety, Pink Plaid & Rebel,. Illamasqua Immodest, Flare and Apocalips..
Bottom row L-R: Illamasqua Drench & Russian Red,  Vegas Volt. Illamasqua Wanton, Plunge, Corrupt and MAC Up The Amp
I finally got my act together and made my lip palette. On most jobs, a lip palette is ideal because it saves both space and weight in an already heavy kit bag. I would only use lipstick straight from the bullet for a 'special occasion' such as for a bride on her wedding day or if I was to ever work on a high profile client (though that is a long way down the road.)

I've seen this process done in many ways, some use a whole lipstick, others a slither. Some melt the lipstick and pour into the box, others cut and smush. I made that word up by the way, but I'm totally sure you all know what I mean. 
I decided that I didn't want to sacrifice a whole lipstick to a Muji pill box. Instead, I cleaned all of my lipsticks and used a third to a half of the product, leaving some remaining in its packaging. Why did I choose to do this? Firstly, because I wanted some lipsticks left over, you never know if the Muji box will become damaged or god forbid, lost. If I had used 12 whole lipsticks and then something bad happened then I'd be waving goodbye to £150+ worth of makeup. Secondly, (as mentioned above) some clients would prefer to see an MUA working from a lipstick bullet rather than a messy palette of smushed up colours. (There's that word again.)

I also decided not to melt my lipsticks. I can't help but feel it is a massive faff for no reason at all, plus I am sure that melting and drying lipsticks will alter their original texture. I want my mattes to stay matte, and anything with glitter in I want to stay evenly distributed.

For this palette I only used a combination of MAC and Illamasqua lipsticks, because they are good quality and high in pigmentation, and not so expensive that it felt a sin to cut them up.

The process is straightforward but fiddly at times. I cleansed each lipstick and used a sharp knife to slice off the desired amount, then smoothing it into its section in the pill box. I later pressed down on each segment to secure it in place. Not as neat looking as those who have melted, but it'll do the job and that's what matters. 

I have used this a few times now and so far it delivers well. It is such a good way of keeping an amount of lipsticks succinct and it also makes it easy to mix different shades on the back of my hand!

Thanks for reading,

E.

Wednesday, 20 March 2013

Midweek Post: Sunset Colours


I have become a little more experimental with colour recently, which I mentioned in my last FOTD post too. Wearing warm, sunset colours on my eyes is fast becoming one of my favourites, I love warm toned colours on cool toned skin as a general preference, because although it doesn't fit in with 'rules' of colour I think it keeps skin looking alive and youthful. Too many cool colours on fair pink skin can look almost morbid sometimes. A way of trying out warm, flush colours on your eyes without buying new eyeshadows is to use blusher! Illamasqua's 'Lover', 'Naked Rose' and 'Beg' blushers are some of my favourites to wear on my eyes.

EHD.


PS I'll be replying to all of the lovely comments that have been left for me in my last few posts early next week. Please don't think I am ignoring you, I read and appreciate every comment and message left for me!

Wednesday, 6 March 2013

Midweek Post: My favourite eye makeup brushes.

There are a few brushes that I cannot imagine being without now, so I thought I had better share them with you so that you don't miss out too!


Real Techniques eyeshadow brush; This is a great eyeshadow brush for packing on the product. It's not too big which I find so many others to be, it is just the perfect size for my eyelids! This is made of synthetic hair so can be used with creams or powders, but I especially love it with powders because I think it picks up product so well.

MAC 217; This is often sold out on the website so you may have already gathered that it is a popular brush. This is a great brush for blending and adding product into the crease of the eye.It's tapered head means that it accesses the crease well without spreading the product over the lid. It also blends powders really well.

Illamasqua Blending Brush 1; This is great for blending eye makeup seamlessly. I always keep it clean and do not use it to apply product with, just swirl it over a smokey eye to blend the colours and fade. Like all the brushes at Illamasqua, it is synthetic hairs which I generally prefer to use.

Laura Mercier Smudge Brush; This is an absolute must have for smudging any under eye colour to create a more smokey or blended finish. It's a great size- it is small enough to be precise but wide enough to remain firm which is an important quality in any smudger brush. Works great with powder and pencil/gel eyeliners.

MAC 210; I have already spoken about this a couple of times before, for me it is a must have for applying gel eyeliner, whether it be for a winged flick or onto the water line. The only downside is that it has frayed slightly and I haven't had it a year yet.

Illamasqua Angled Brush; This is the best angled brush I have ever used for several reasons. Firslty, the brush is made of synthetic hair which makes it both cruelty free and multipurpose in terms of being able to use it with liquids, creams and powders. The length is perfect- it's as if Illamasqua have taken a standard angled brush and cut it in half, making it short and wide, therefore a lot firmer (perfect for creating straight lines or sculpted brows with ease) and alllowing more control as it isn't as flimsy. My brows have improved ten fold since I have been using this brush, the size is just perfect. Worth every penny.


Thursday, 28 February 2013

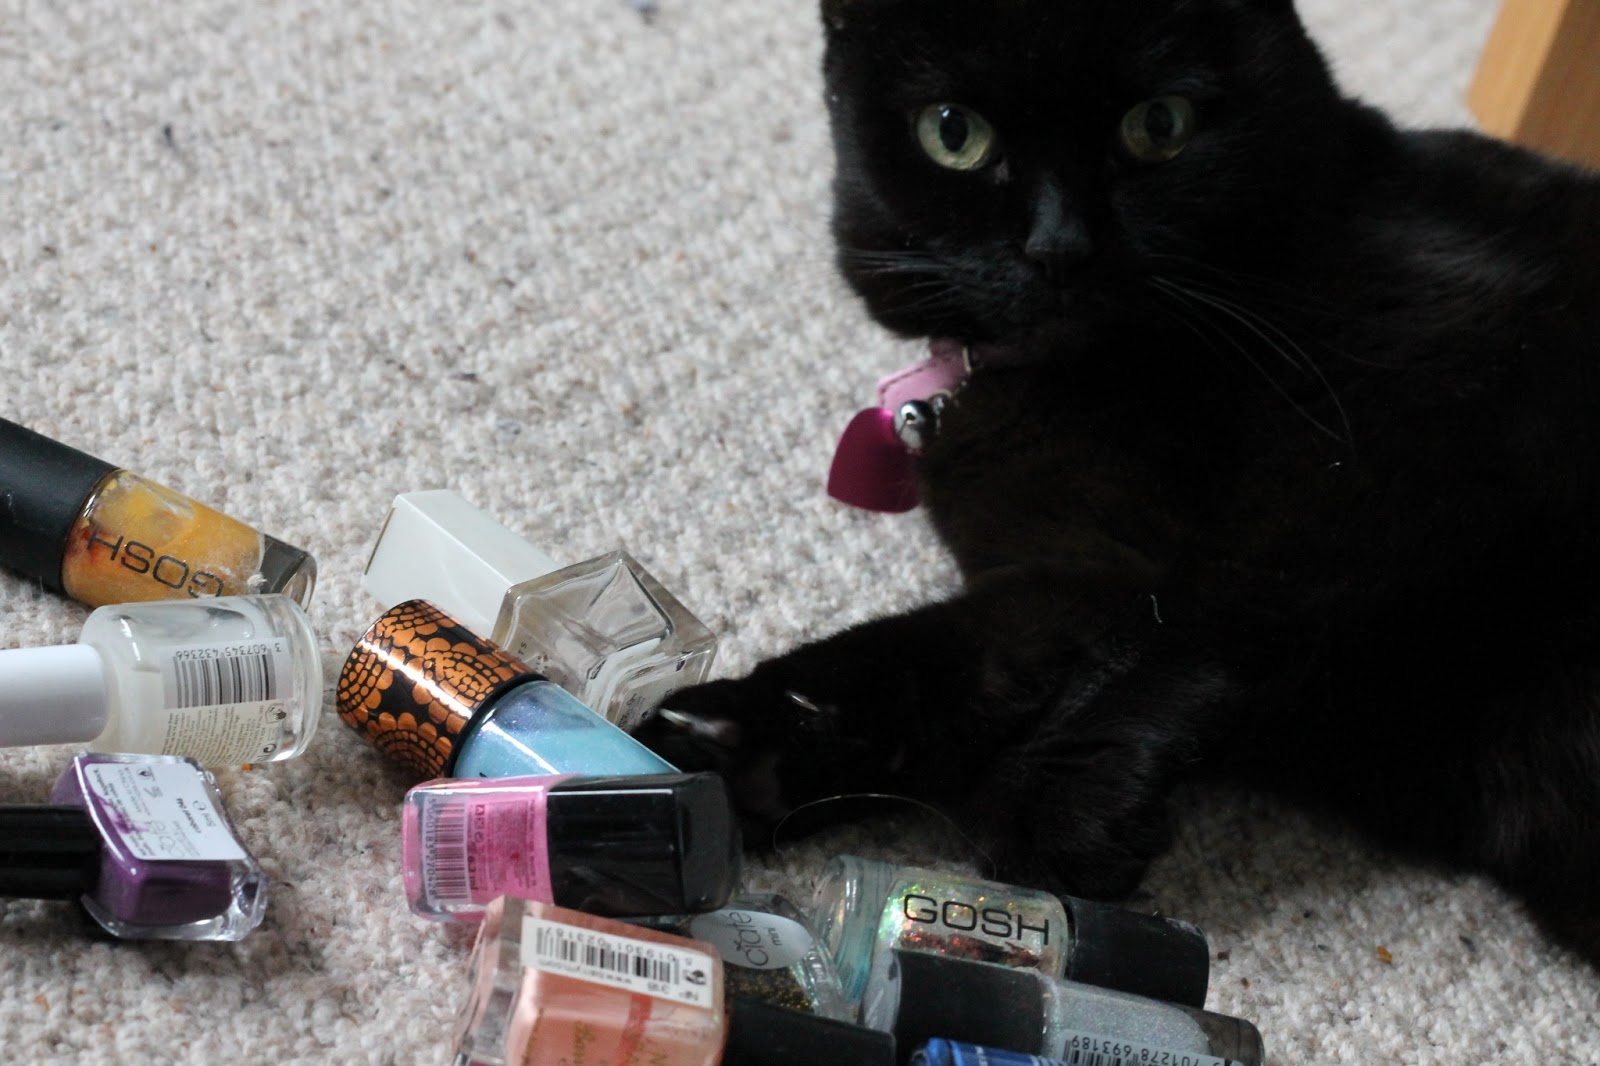
My Nail Varnish Storage


I have been meaning to blog about my nail varnish storage for moooonths. I recently realised that I manage to leave a trail of nail varnishes behind me. I knew I had a lot but it wasn't until I sat down and counted them all that I had the sickening realisation that I owned just a few short of 100 nail polishes. No girl, needs 100 nail polishes. Not even the nail bars I used to frequent had 100 nail polishes! Always keen for a mini spring clean (my makeup drawers are calling me- they're in one hell of a state) I thought I had better sort through my varnishes as there is no way that I wear all of them or will ever want to wear some of them again.

Above you can see the before, during, and after pictures. I streamlined my collection and put lots aside to go on to new homes, be put in the bin, or to be sent to Give and Makeup. These included the majority of my Barry M, all of my 17 (they chip too quickly), prehistoric MUA, gooey GOSH and Rimmel, plus excess coral varnishes from Nails Inc. (I had 6 corals. All the same. Girl got problems)

The storage:
The shelves are from the Ribba range that you can buy from Ikea for around the £5-£8 mark. I bought these shelves a year ago when I was shopping with my mum and instantly knew they were perfect for nail varnishes. 
I didn't put too much thought into how I would organise the ones that made the cut, I just sorted them by brand. Top shelf, front row I put my Illamasqua beauties, O.P.I, No.7, Nars, Dior, Rococo, Jessica, China Glaze and Orly. Behind the front row I put some odd glitter polishes and unbranded ones, and some nail wraps.
Second shelf I put my Essie's, Models Own, L'oreal Colour Riche, GOSH (including the original Holographic polish which I couldn't bring myself to get rid of), and all of the mini Ciate from my advent calendar. Behind these I popped any spare base and top coats and the one Barry M the made the final line up ('Mushroom' incase you were wondering.)

Already I feel a little more organised and have made it my aim to sort one section out each week. Now my nail stash is sorted I fear it may be time to move onto lip products..I dread to think how many of them I own! Would you be interested in seeing more spring clean/storage posts?


Wednesday, 6 February 2013

Midweek Post: A Pop Of Colour


I must have been feeling a bit fruity last week when I decided that orange and blue in the same makeup look was going to be a good idea. In the end, I really liked the outcome and wearing a pop of colour during these dark winter (I am not a big fan of post- Christmas winter) days is a quick and an easy way to brighten up my mood. Orange and blue are complimentary colours and a couple of people made nice comments about my makeup that day, which is always nice isn't it?

I used the Urban Decay Naked Basics palette on my eyelids to create a natural brown look and then put Illamasqua's medium pencil in 'Debonair' under my waterline. I blended it with one of my Laura Mercier brushes and added a bit of brown from the UD palette in the outer corners to tie in the overall look. Granted, the medium pencil needed to be touched up throughout the day which was a bit of annoyance. On my lips I used a true vivid orange lipstick also from Illamasqua called 'Flare'. The formula is a little stiff but it is ultra matte and so was the perfect choice on a windy day! Nothing worse than hair getting stuck in lipgloss! 

I enjoyed wearing something a bit different and have been trying out different looks recently, I'll try and document a few of them for this ere blog :-)

P,S, Can you tell I still can't use my camera properly? ;-D


Thursday, 31 January 2013

New In! Illamasqua 'Speckle' Nail Varnish

Illamasqua 'Speckled' Nail Varnish, £14.50 for 10ml. (Limited Edition)


Attention nail polish addicts! There are some new kids on the block, released today as part of Illamasqua's new spring collection named 'I'mperfection' these limited edition pastel shades seem to be a perfect ode to upcoming spring with their 'speckled egg' type finish. I think the finish of them is so unique in their matte glitter type effect and I am a sucker for lilac so had to have this one. The baby blue comes a close second though. I might have to buy it.

I found that one coat was very watery, with two coats it intensifies and the layers of speckles build up. Pictured above is three coats and a top coat to make them shiny. I think that the effect is pretty exciting as I haven't really seen anything like it before. I love that the finish is quite muted, it's a way of wearing decorative nails but with a more mature or sophisticated edge in comparison to outlandish glitter designs (though there ain't nowt wrong that either.) 

The speckled and irregular finish of these fit into the 'I'mperfection' campaign perfectly with Illamasqua encouraging us to embrace our perceived  flaws and make them a feature to be proud of, whether it be freckles or a birthmark. I've got a couple of other bits from this collection, would you be interested in seeing them?

Will you buy one of these polishes? Do you love the finish of them as much as I do?

P.S. Please excuse my horrible looking short nails. But I couldn't wait for them to grow back before I showed you!


Sunday, 25 November 2012

Rebel, Rebel.

MAC 'Rebel' lipstick, £14 for 3.5g. 


Thanks to the gorgeous Catrine over at Unnaked Nails I finally convinced myself that yes, another MAC lipstick was in order. 'Rebel' dropped on my doorstep earlier this week (well the Yodel man handed my box of goodies over, we're firm friends) and I whipped it on straight away. It is a deep blackberry purple shade and is of 'satin' finish. While I always find the MAC satin lipsticks drying (more so than the other finishes) I can overlook that point because I luuurrrve this shade. It's deep, but sophisticated without being too gothic. Though if you are a goth, this could totally work for you too.
As ever, unless you're going on a big night out or have a fancy do to attend, keep the eye makeup minimal. I used NARS 'Abysinia' as a base with MAC's 'Haux' in the crease and added lashings of mascara. See below for the rest of the products I used.

Please excuse the 'MySpace pose' above.

Face:
Illamasqua Skin Base Foundation in 02
Collection 2000 Lasting Perfection Concealer in 'Fair'
Bobbi Brown Brightening Face Powder in 'Brightening Nudes'
Illamasqua blusher 'Lover'

Eyes & Brows
Benefit 'Stay Don't Stray' eye primer
NARS 'Abyssinia' eyeshadow
MAC 'Haux' eyeshadow
YSL 'Shocking' mascara
Benefit Brow Pencil 'Medium'
Bobbi Brown Gel Eyeliner 'Sepia Ink'

Lips:
MAC lipliners in 'Brick' and 'Magenta'
MAC 'Rebel'

Would you dare to wear Rebel?


Wednesday, 31 October 2012

Midweek Post: "Halloween Makeup"


I don't really do dressing up, especially at the moment when I am trying to be as sensible as I can with money, forking out on a Halloween costume is not top of my agenda. However, last night we had tickets for a ghostly walk around St Fagans in Cardiff so I thought I may aswell join in the spirit of Halloween. I chose a purple gradient lip with matching purple nails. Any excuse for me to wear some purple makeup, eh?

I lined my lips with MAC Magenta lipliner and filled it in with Rimmel's Kate Moss lipstick in 04, making sure it was completely opaque at the edges to add depth. I added MAC 'Up The Amp' lipstick and blended it out with a lip brush. To add a bit more depth I dabbed Illamasqua 'Plunge', but only in the centre of the lips. It took me about ten minutes and it was worth the effort- I loved the outcome! I paired this daring lip with a soft, subtle taupe smokey eye and small brown eyeliner flicks. I contoured fairly heavily using MAC's 'Harmony' and used MAC 'Soft and Gentle' Mineralize Skin Finish to highlight my cheekbones with- I missed out blusher completely!
I also popped No.7's 'Blackberry' nail polish on my nails then added some depth with Dior's 'Rock Coat'- this is a topcoat that makes nail varnish look 'smokey'. I love it. Sorry I didn't get a picture, but you can view it's effects here if you want to.

What are your plans for Halloween? Do you embrace it with full on costume or does it pass you by?

Wednesday, 15 August 2012

Midweek post: my makeup rutt: two favourite blushers!

Estee Lauder blusher in 'Peach Nuance', £24 for 7g
Benefit blusher in 'Sugabomb', £23.50 for 12g


Whilst grabbing a familar box o'blush in a rush the other day, and then swirling it on my cheeks I realised that I looked exactly the same as I did the day before, and the day before that, and the day before that...- that I'd used that blusher the day before, as well as that foundation, that eyeshadow and that lipgloss. Urgh, that feeling, that realisation that I have become stuck in one of those 'makeup rutts'. I've heard people talk about them. I never thought one of 'them' would happen to me, after all, I have previously taken pride in the fact that I do rotate my products and do try new things, but it got me panicking...

Whilst I'm stuck in this rutt, I thought I may aswell document it for you all to see and read about. I'll start with the two blushers, the only two blushers I have used for at least the past two months now, it is absolute love I have for both of these shades, but I do understand that I can't neglect the other 1547895 blushes in my possession for much longer. I promise that from now on I will make a conscious effort to mix it up, promise.

       *************************************

I have mentioned this in a favourites video in the past as it's a shade that I truley love and know I will buy again when it runs out oneday. 'Peach Nuance' is a satin finish, which means there's no shimmer or sparkle which makes it very versatile as it can be worn on it's own subtley or can be paired with a powder highlighter to add a glisten to the cheekbones if so desired.
'Peach Nuance' is no longer available as Estee Lauder recently reformulated their blushers and brought out a new shade range. However the good news for you is, you can still buy it but now it is known as 'Witty Peach' instead and while it is the same shade it now comes in nicer, more golden bling packaging and a larger travel brush beside it for better application on the go.
The colour itself is a peach coral shade, that can be deepened or lightened depending on which end of the pan you swirl your blush brush. I love the gradient between the yellow peach to the coral pink, it's so unique and beautiful to look at. The powder is so smooth to apply, and it's easy to choose whether you want a sheer wash or a flush of colour. Pefect to awaken any tired or dull complexions and one that would also look lush with a tan.


My other favourite blusher at the moment is one that has been in my possession for a long time and was given to me for free when I used to work for Benefit. Sugabomb is such a gorgeous coral for those of us who are pale skinned as it isn't too deep or unnatural. It's one of those shades that freshens up the complexion so well and I love building it up to a brighter pop of colour. Unlike Peach Nuance, Sugabomb does have a subtle shimmer running through it that transfers onto the skin as a highlight. I find this powder works best with a blusher brush that is densely packed with fibres, such as the Illamasqua brushes or even the MAC 116.

As you can see, I'm a girl obsessed with the coral blush. I think peach and coral add a lift and pop that other shades don't do. Hopefully my pink blushes won't go unloved for much longer, I'm hoping I'll transfer back to them when winter rears it's ugly, ugly face. But in the meanwhile, any help or advice to a girl stuck in a coral blush rutt? Or if that fails, any other coral or peach blushers you can recommend to me?!